Skip to content

2026 How to Install a Furnace Humidifier?

Installing a furnace humidifier can make dry winter air feel noticeably better. It may reduce static shocks, cracked wood, and irritated skin throughout your home.

This 2026 guide explains furnace humidifier installation in a practical, safety-focused way. You will learn how the humidifier connects to the supply or return duct, water line, drain, and control system. Clear photographs, careful measurements, and manufacturer instructions matter more than speed. A small mistake near a heat exchanger or electrical connection can create expensive problems.

Experience shows that every furnace room has its own complications. Some installations have limited clearance, uneven ductwork, or no nearby drain. Older homes may also contain unfamiliar wiring. Check the furnace model, humidifier capacity, voltage, water pressure, and recommended mounting position before making changes. Local building requirements and manufacturer instructions should guide the work.

Not every installation is a suitable do-it-yourself project. If you are unsure about electrical connections, gas equipment, drainage, or duct cutting, consult a qualified HVAC professional. A licensed technician can verify airflow, test for leaks, adjust humidity controls, and confirm safe operation. Do not assume the first setting is perfect. Indoor humidity may need adjustment after observing window condensation, room comfort, and weather changes.

The goal is controlled moisture, not a damp house. Careful planning helps protect your furnace, ductwork, flooring, and indoor air quality while supporting reliable performance.
2026 How to Install a Furnace Humidifier?

Furnace Humidifier Types, Benefits, and Installation Requirements

2026 How to Install a Furnace Humidifier?

Furnace humidifiers usually use bypass, fan-powered, or steam technology. Bypass models use warm air from the supply duct and need a return-air connection. Fan-powered units include a small blower, so they often produce more moisture without relying on a large duct pressure difference. Steam humidifiers respond quickly, but they require dedicated electrical capacity, careful drain routing, and qualified installation.

Humidity control is the real objective. The U.S. Environmental Protection Agency recommends maintaining indoor relative humidity between 30% and 50%. ASHRAE guidance also treats humidity as an important part of thermal comfort and building performance. Install the humidifier on the supply or return duct according to its design, then add a properly located humidistat. Keep sensors away from direct discharge air. Condensation on windows or ducts signals excessive humidity, poor insulation, or incorrect control settings.

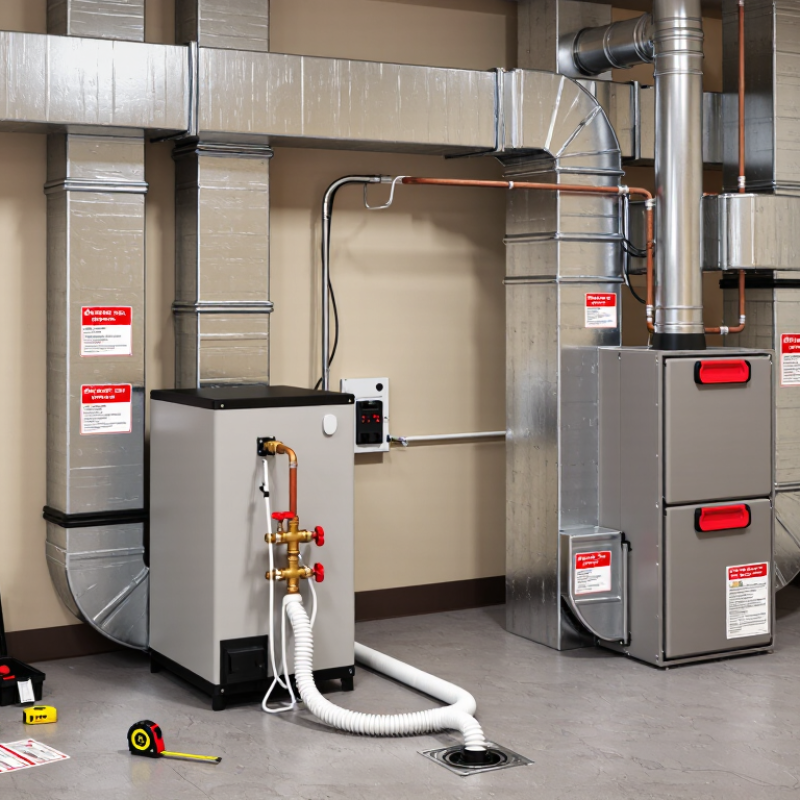
The installation needs more than a mounting hole. Check furnace airflow, available water supply, drain slope, electrical protection, service clearance, and compatibility with the duct material.

A drain without a reliable slope can cause standing water. That is a small detail.

A common weak assumption is that a larger humidifier always works better. It may instead create wet duct surfaces and microbial growth risks. Commission the system during heating operation, measure room humidity with an independent meter, and inspect nearby ducts after several cycles. EPA’s Indoor airPLUS guidance supports moisture control and proper ventilation, but real homes differ. Even a careful installation may need seasonal adjustment.
Tools, Materials, and Safety Checks Before Installation

2026 How to Install a Furnace Humidifier?

Tools, Materials, and Safety Checks Before Installation

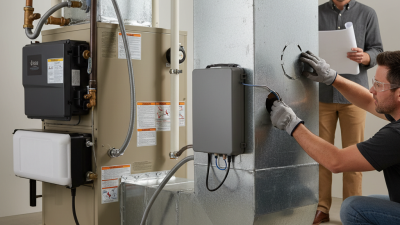
Before installation, gather a drill, level, screwdrivers, tubing cutter, adjustable wrench, and a flashlight. Keep approved duct sealant, drain tubing, mounting screws, a water shutoff, and a replacement humidifier pad nearby. Check the furnace manual and the humidifier instructions together. They may require different clearances or wiring methods. I once measured the cabinet twice but still marked the wrong side. A dry fit would have caught that mistake.

Turn off the furnace electrical disconnect and the water supply. Verify that power is absent with a properly rated tester. Let the furnace cool completely. Inspect the cabinet for hidden wiring, gas piping, flue components, and service panels before drilling. Never block combustion-air openings or cover access points. Confirm that the drain can flow downward without sharp bends. Water leaks often begin with rushed connections.

Tips: Use a level before tightening screws. Keep wiring away from hot surfaces. Use an approved water connection, not an improvised valve. Photograph existing wiring before disconnecting anything. If the unit needs new electrical work, difficult duct cutting, or gas-line changes, contact a qualified HVAC technician. Local requirements can vary. My preference is to pause when instructions seem unclear, even if the installation looks simple. Safety is less visible than the finished equipment.

How to Position and Mount the Furnace Humidifier

Positioning determines whether a furnace humidifier adds useful moisture or creates duct problems. The U.S. Environmental Protection Agency recommends indoor relative humidity between 30% and 50%. ASHRAE guidance also warns that excessive humidity can support condensation and biological growth. Mount the humidifier on a flat, accessible section of ductwork. The supply plenum is common, but only when airflow direction matches the unit’s design.

Keep the cabinet level. A slight tilt can disturb water distribution and shorten pad life. Place it where a technician can remove the cover without touching hot furnace surfaces.

Leave working clearance for the water panel, drain connection, and electrical service. The drain should slope continuously toward an approved outlet, without loops that hold stagnant water. Small details matter.

A bypass duct needs a short, direct route between supply and return air. Avoid sharp bends when possible. Poor routing may increase leakage and reduce moisture delivery. The furnace cabinet should not carry the humidifier’s weight unless the installation instructions specifically allow it. Use suitable fasteners and seal duct joints with approved sealing materials.

A neat installation can still be wrong. Recheck airflow arrows, service access, and drain pitch before tightening every screw. Field conditions often force compromises, but blocking a filter door or placing the unit above sensitive controls is not a reasonable one. EPA’s Indoor airPLUS construction specifications and the ACCA HVAC Quality Installation checklist provide useful reference points for verification.

How to Connect Water, Drainage, Power, and Humidity Controls

2026 How to Install a Furnace Humidifier?

How to Connect Water, Drainage, Power, and Humidity Controls

Begin by checking the furnace cabinet, airflow direction, and available service clearance. The humidifier must receive steady air movement, not a stagnant return-air pocket. EPA guidance recommends maintaining indoor relative humidity between 30% and 50%. ASHRAE Standard 55 also links humidity with thermal comfort. I use a hygrometer before installation. Guessing is easy, but it creates avoidable problems.

Connect the water line with an approved shutoff valve and accessible compression fittings. Keep the tubing supported and away from hot surfaces. A kinked line can quietly reduce output. Route the drain with continuous downward slope, using an air gap where local requirements demand one. Secure the hose above the drain pan. I once found a “working” system with a slow leak hidden behind insulation. It was not working well.

Turn off furnace power before connecting controls. Follow the equipment wiring diagram, and protect low-voltage conductors from sharp cabinet edges. The humidistat should sense representative indoor air, away from supply-air discharge. Set the initial target near 40% relative humidity, then adjust for window condensation and outdoor temperature. EPA’s Indoor Air Quality Guide supports the 30%–50% range, but every building responds differently. Test water flow, drainage, fan operation, and control response together. Recheck everything.

2026 How to Install a Furnace Humidifier? - How to Connect Water, Drainage, Power, and Humidity Controls
Step Installation Area Typical Requirements and Data Connection and Installation Method Verification and Safety Check
1 Select the Mounting Location Common location: supply-air or return-air duct, depending on humidifier type.
Clearance: leave enough room for the water panel, drain connection, wiring, and future servicing.
Position the unit on a flat section of ductwork where airflow is available. A bypass unit normally uses a bypass duct between supply and return air. A fan-powered unit generally mounts on the supply or return duct without a bypass connection. Confirm that the cabinet does not interfere with furnace access panels, filters, dampers, or other service components. Follow the equipment installation manual for the permitted airflow direction.
2 Prepare the Duct Opening The opening size is determined by the humidifier cabinet template. The cutout must not obstruct internal duct supports or electrical components. Mark the template, drill pilot holes, cut the duct opening, and fasten the cabinet with approved sheet-metal screws. Seal the perimeter with approved foil HVAC tape or duct sealant. The cabinet should be rigid, level, and airtight. Avoid sharp exposed metal edges and confirm that the access cover can be removed without disconnecting permanent wiring.
3 Connect the Water Supply Typical tubing: 1/4-inch outside-diameter copper or approved plastic tubing.
Supply: cold potable water with an accessible shutoff valve.
Pressure: use the humidifier's rated range; many residential units accept approximately 20–125 psi.
Install an approved shutoff valve and connect the supply tubing to the humidifier inlet. Keep the tubing away from hot furnace surfaces and provide a service loop. Use a compression fitting or the fitting specified for the unit. Do not use an unapproved piercing or saddle valve where local plumbing rules prohibit it. Open the shutoff slowly and inspect every fitting for leaks.
4 Install the Water-Distribution Component Evaporative systems commonly use a water panel or evaporator pad. Water should flow evenly across the pad and collect in the drain tray. Install the distribution tray, pad, nozzle, or internal water valve exactly as specified for the unit. Keep the pad in the correct airflow orientation and ensure the cover is fully seated. Run a short test cycle. Water should wet the pad or distribution surface without spraying into the duct or overflowing the cabinet.
5 Connect the Drainage Typical drain tubing: approximately 1/2-inch inside diameter, when required by the unit.
Slope: maintain a continuous downward slope of about 1/4 inch per foot where possible.
Route the drain to an approved floor drain, condensate pump, or plumbing connection. Secure the tubing, avoid kinks, and install an air gap or trap only when required by the equipment and local code. The drain must not discharge onto the floor, electrical equipment, or the furnace cabinet. Pour water into the drain pan or run a test cycle to confirm unrestricted flow and no backflow.
6 Connect the Electrical Power Most residential furnace humidifiers use a low-voltage control circuit, commonly 24 VAC. Some fan-powered models may have a separate line-voltage power supply. For a 24 VAC system, connect the humidifier control circuit to the furnace accessory terminals or approved transformer terminals according to the wiring diagram. For line-voltage equipment, use a properly rated disconnect, wiring method, and electrical box. Turn off power before wiring. Verify voltage with a meter, protect wires from moving parts and hot surfaces, and ensure the circuit rating matches the equipment requirements. Line-voltage work should be performed by a qualified electrician.
7 Install the Humidity Control A humidistat or automatic humidity controller typically operates the humidifier when indoor relative humidity is below the selected setpoint. Automatic controls may use an outdoor-temperature sensor. Mount the control on an interior wall, away from supply registers, exterior doors, direct sunlight, kitchens, bathrooms, and other moisture sources. Wire it in the control circuit as shown in the approved wiring diagram. The control should sense representative room air. Do not place it where drafts or localized moisture can cause false readings. Confirm that the control calls for humidity when the indoor humidity is below its setpoint.
8 Connect the Furnace Operating Signal Humidification normally requires an operating signal from the furnace or air handler so water is supplied only when airflow or heat operation is available. Connect the humidifier or control relay to the designated furnace accessory, heat-call, or blower-interlock terminals specified by the equipment wiring diagram. Do not connect directly to unknown terminals. During a demand for humidity, confirm that the furnace blower operates as required and that the humidifier activates only under the intended operating condition.
9 Set the Initial Humidity Level A commonly recommended winter indoor range is approximately 30–40% relative humidity. Colder outdoor temperatures may require a lower setting to prevent window condensation. Start near 35% relative humidity and adjust gradually. If condensation appears on windows, exterior walls, or ductwork, reduce the setpoint and inspect insulation and ventilation conditions. Use a calibrated hygrometer for comparison. Indoor humidity should be comfortable without persistent condensation, mold growth, or damp building materials.
10 Perform the Final Test Test water flow, drain flow, electrical operation, blower interlock, humidity control response, and cabinet sealing. Restore power, call for humidity, observe the water valve or pump, and verify that water reaches the distribution area and exits through the drain. Check operation through at least one complete demand cycle. Record the control setting and service date. Recheck for water leaks, unusual noise, loose wiring, air leakage, and drain overflow before leaving the installation in service.
11 Routine Maintenance Inspect the water panel, drain line, water inlet screen, cabinet, and control operation at least once per heating season, or more often where water mineral content is high. Shut off power and water before service. Replace or clean the water panel as specified, flush the drain, remove mineral buildup, and inspect tubing and fittings. Never service moving parts or electrical connections while energized. If the furnace uses gas, combustion, or line voltage, repairs and alterations should be completed by a qualified professional.

How to Test, Adjust, and Maintain the Installed Humidifier

After installing a furnace humidifier, testing confirms that it works safely and evenly. Place a reliable hygrometer in the main living area, away from vents and windows. With the furnace running, raise the humidistat slightly above the room reading. You should hear the water valve open and see water entering the unit. Check the drain for steady flow and inspect nearby connections for leaks. If no water appears, verify the power switch, wiring, and water supply. Keep hands clear of moving furnace parts.

Adjust the humidistat gradually instead of choosing a high setting immediately. A practical winter target is usually 30% to 40% indoor humidity. During very cold weather, lower the setting to reduce window condensation. Watch the glass each morning. Persistent moisture may signal excessive humidity or poor air circulation. In field checks, I have seen homeowners trust the humidistat without comparing it with a separate hygrometer. That small error can keep the system running too long.

Maintenance should follow the equipment manual and local safety requirements. Turn off power before opening the cabinet. Inspect the water panel, drain tube, filter, and electrical connections every few months. Remove mineral buildup carefully, and replace the water panel when deposits restrict flow. Check the drain for slime or blockage. If water collects inside the furnace cabinet, stop operation and contact a qualified technician. Record the service date and indoor humidity reading. The inspection takes minutes.