How to Choose a Stained Glass Window Kit?
Choosing a Stained Glass Window Kit is not merely a color decision. It affects safety, light, maintenance, and the character of a room.
The U.S. Department of Energy reports that windows can cause 25% to 30% of residential heating and cooling energy use. This figure concerns complete window systems, not decorative kits alone. Still, it reminds buyers to examine glass placement, sealing, and sunlight exposure carefully. A south-facing window may need stronger color control. A bathroom may require privacy glass and moisture-resistant materials.
Industry guidance also matters. The National Fenestration Rating Council promotes U-factor and Solar Heat Gain Coefficient ratings for evaluating window performance. Most craft kits do not carry these ratings. That limitation deserves attention. A kit should enhance an existing window, not replace professional glazing advice.
Experienced makers usually compare pattern complexity, glass thickness, copper foil quality, soldering requirements, and included safety equipment. Beginners may prefer a small 20-by-20-inch design with pre-cut pieces. Large panels can become heavy quickly. They can also expose weak joints. Ask whether the instructions explain ventilation, protective eyewear, and lead-free or leaded solder choices. Do not assume the cheapest box contains everything.
No single kit fits every home. A bright geometric design may suit a hallway, while translucent botanical glass can soften a bedroom. The right choice balances appearance with installation conditions, personal skill, and long-term care. This guide examines those decisions through practical testing, manufacturer information, and recognized window-performance guidance.
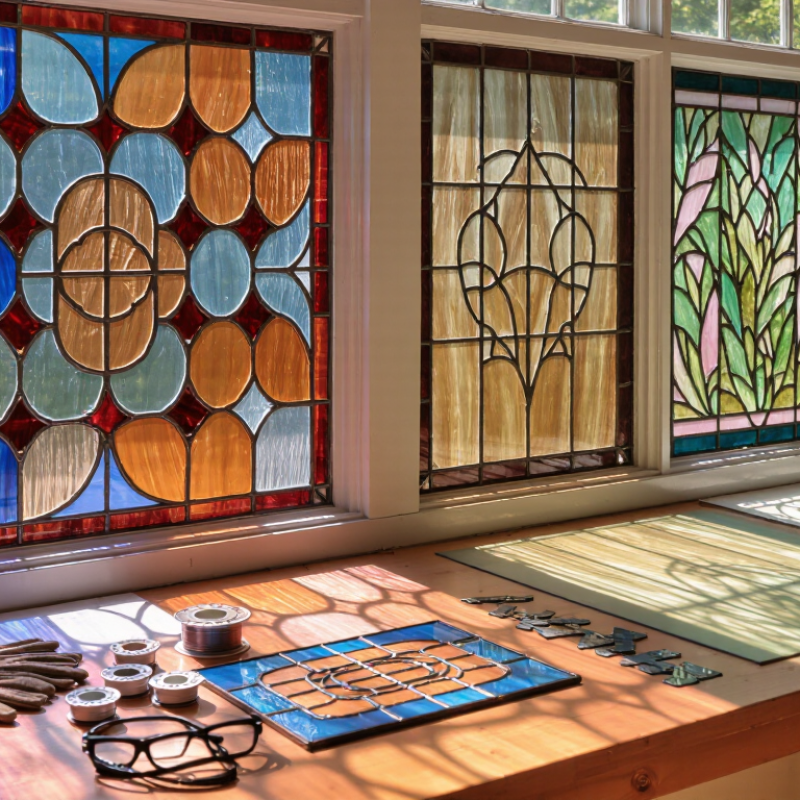
Define Your Stained Glass Project, Skill Level, and Design Goals
Choosing a stained glass window kit begins with defining the project, not admiring the prettiest color palette. Decide where the piece will go, how much light it should filter, and whether it will hang freely or fit inside a frame. Measure the opening twice. A small decorative panel usually needs fewer materials and less cutting precision than a full window insert. Think about privacy, too. Clear glass can look beautiful but may reveal more than expected.
Your skill level should guide the kit’s complexity. Beginners often learn faster with simple geometric patterns, medium-sized pieces, and clearly numbered templates. I recommend checking whether the kit includes a glass cutter, foil, solder, flux, pattern paper, and safety guidance. Some kits omit essential tools. That can quietly increase the cost. Cutting glass requires patience, eye protection, and a stable work surface. Soldering also needs good ventilation and careful heat control.
Design goals deserve equal attention. Choose colors that respond to the room’s daylight, not only to indoor lighting. Textured glass can create moving shadows across a wall. Strong contrast makes shapes easier to read from a distance. My first design was too detailed, and several tiny pieces weakened the overall effect. That mistake taught me to simplify earlier. Sketch the pattern at full size, test the color balance, and leave room for small imperfections. Handmade glass rarely looks perfectly uniform. That is part of its character.
Compare Kit Types, Materials, Tools, and Included Instructions
How to Choose a Stained Glass Window Kit?
Start with the kit type. Copper-foil kits suit small suncatchers and detailed patterns. Lead-came kits require stronger cutting and fitting skills. I have found that foil kits offer more visible progress, especially when pieces vary slightly. That flexibility matters. The Association for Creative Industries reported that the U.S. craft market reached about $52 billion in 2023. Many new makers are entering through accessible home projects, but “beginner” does not always mean complete.
Compare the materials carefully. Look for compatible glass sheets, copper foil, solder, flux, a pattern, and a stable work surface. Some kits include only consumables. Others omit essential tools, such as running pliers, a glass cutter, a soldering iron, or safety glasses. Instructions deserve equal attention. Clear diagrams should show cutting lines, grinding points, soldering order, and ventilation practices. Grand View Research has projected strong growth for the global arts and crafts market through 2030, yet kit quality remains inconsistent. A polished box can still contain vague instructions. That is worth questioning.
Tips: Choose a pattern with fewer than 15 pieces for your first project. Check glass thickness before buying replacement supplies. Avoid kits without safety guidance. Read the instruction sequence before opening the package. If the pattern feels confusing, pause. My own early cuts were not precise, and forcing a poor fit made the final window weaker. A slightly imperfect design can be repaired; rushed soldering usually creates more work.
How to Choose a Stained Glass Window Kit?
This comparison shows the typical number of essential components found in beginner kits for three common stained-glass methods. Materials include the glass and bonding supplies; tools include the main cutting, shaping, and assembly equipment. Actual kit contents vary by project and supplier.
Copper foil kits generally require more assembly tools, lead came kits add structural framing supplies, and mosaic kits focus on adhesive, grout, and surface-preparation materials. Always confirm that safety glasses, ventilation guidance, and clear step-by-step instructions are included.
Check Glass Quality, Cutting Requirements, and Safety Equipment
How to Choose a Stained Glass Window Kit?
Glass quality affects every cut, joint, and finished edge. Hold each sheet near a window and check its color, thickness, and surface. Small bubbles can add character, but deep cracks create weak points. Uneven glass may also break unpredictably.
I once chose a beautiful textured sheet without testing it first. The cutter dragged, and several pieces became unusable. Check whether the kit includes glass suited to your skill level and pattern design.
Cutting requirements deserve equal attention. A simple geometric pattern needs fewer complicated curves than a floral design. Confirm that the kit includes a glass cutter, running pliers, grozing pliers, and access to a grinder if required. Some kits assume you already own these tools. That assumption is easy to miss. Read the project instructions before buying, especially if the design contains narrow points or tight interior cuts.
Tips: Wear certified eye protection, closed shoes, and a fitted apron. Cut-resistant gloves can protect your hands, but they may reduce grip and control. Try them with scrap glass first. Keep your worktable bright and stable. Use ventilation when grinding, and clean glass fragments with suitable tools, not bare fingers.
I still occasionally rush a cut, which is exactly when mistakes happen. A slower rhythm usually gives better control.
Evaluate Kit Size, Difficulty, Cost, and Workspace Needs
How to Choose a Stained Glass Window Kit?
Kit size should match your hands, table, and patience. A 20-centimetre panel is easier to support than a large design. It also needs less cutting time. The Craft Industry Alliance’s 2023 maker survey reported that beginners commonly prioritize manageable projects and clear instructions over advanced tools. That finding fits my workshop experience. Small kits reveal mistakes quickly. Choose one with fewer than 30 pieces for a first attempt. More pieces mean more grinding, foiling, and alignment decisions. It can become frustrating.
Difficulty affects both cost and workspace needs. A beginner kit may include glass, foil, solder, and a pattern, but not every safety item. The U.S. Consumer Product Safety Commission’s 2022 injury data recorded millions of emergency-department-treated, tool-related injuries across consumer activities. Stained glass requires careful handling, even at home. Use a stable table, bright task lighting, ventilation, heat protection, and a separate area for sharp scraps. The American Industrial Hygiene Association recommends controlling airborne contaminants at their source, so do not work beside food or in a closed bedroom. Keep the surface washable.
Cost is easy to underestimate. Compare the full setup, not only the box price. Add a cutter, grozer, soldering iron, flux, eye protection, and waste storage. A cheaper kit may need more replacements. That is not always cheaper. I once chose a complex pattern because it looked attractive; the extra grinding doubled my working time. A simpler kit may teach more. Check the instructions before buying.
Select a Kit That Matches Your Technique and Desired Finished Result
Choosing a stained glass window kit starts with your technique, not its box design. Copper foil suits small panels, curved pieces, and detailed patterns. It wraps each glass edge with adhesive-backed foil before soldering. Lead came works better for larger, traditional panels with straighter lines. It requires accurate cutting and careful joint fitting. Choose the method you can practice consistently.
Your desired finished result also controls the kit contents. A translucent mosaic may need small glass pieces, a grinder, and several foil widths. A clean geometric window may need a glass cutter, running pliers, a soldering iron, flux, and a stable work surface. Check whether the kit includes safety glasses, heat-resistant protection, and clear instructions. These details matter. Some beginner kits include tools that feel usable but lack precision. I have found that uneven cutting often causes more frustration than soldering itself.
Consider the window’s final location before buying. Sunlight can reveal rough edges, cloudy solder lines, or weak framing. Select compatible glass thicknesses and avoid mixing materials without checking their specifications. Work with ventilation, wash your hands after handling chemicals, and keep hot tools away from children and flammable surfaces. My first panel was slightly uneven, despite careful measuring. That mistake taught me to leave more fitting time than the pattern suggests. A kit should support learning, but it cannot replace patience, practice, or honest inspection.